Simul Blog
How to add or change a hanging indent in Microsoft Word
What is a hanging indent and when do I use it?
A hanging indent is when you indent the second line in a paragraph, alongside all subsequent lines in this paragraph while leaving the first line without any ident, sitting in line with the margin of your document.
Also known as a second line indent.
Most commonly used in citations and biographies to allow a reader to easily scan a cited work or list of names. If your cited entry is more than two lines long, you should be using a hanging indent.

Unlike the first line indent which can be created at the touch of a button [TAB], the hanging indent does require a few more steps. Simple, quick and easy but still something that can leave you wondering why you just can’t figure out how to make it work.
In this post, we will walk you through how to insert a hanging or second line indent into your document. These steps can also be used to change to size of your hanging indent or to remove it all together.
Continue reading below…
Inserting and editing a second line indent
- Open Word
- Place your cursor where you would like the insert or edit the first-line indeed
- Right Click
- Click Paragraph
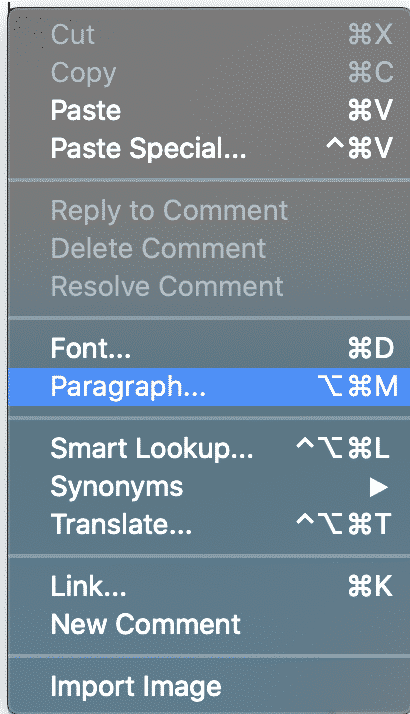
- Select Hanging under ‘Special’
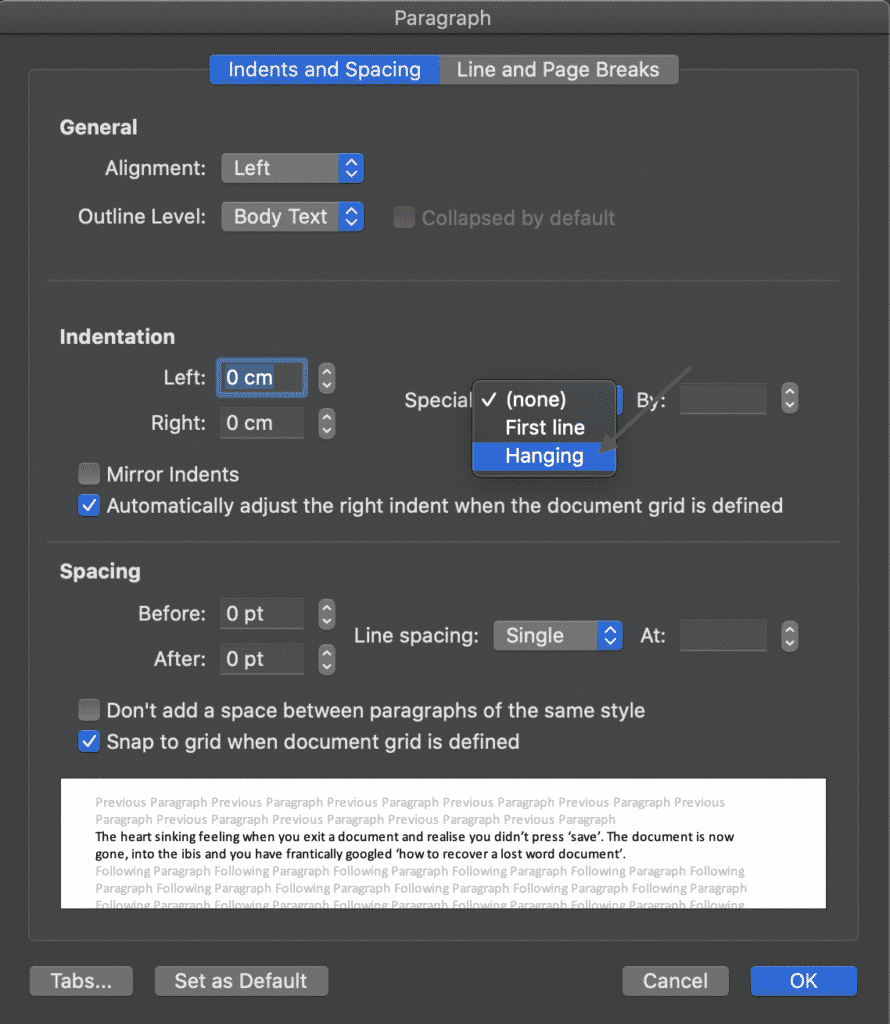
- Select the indent size, customising the indent to best suit your document
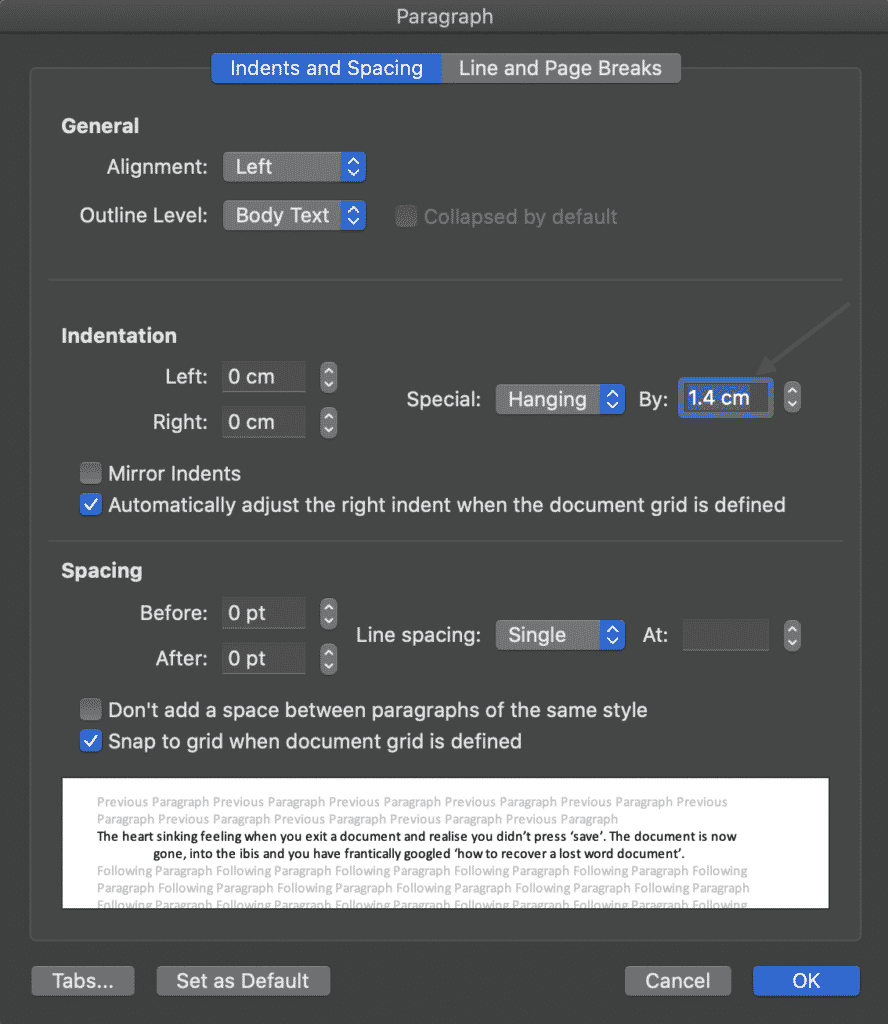
- Press OK
You have now added and or edited a hanging indent in your Microsoft Word Document.
You can customise the indent size on each paragraph, however it is recommended that you either work with the standard 1.27cm indent or the same size indent throughout your document.
Searching for a better way to work together in Microsoft Word Documents?
When working with a number of people in the same Word document you can quickly find yourself siphoning through old versions to compute who made what changes where and when.
Unless you each have a dedicated ‘edit’ day or time slot, you may also end up accidentally working on the same Word document, at the same time. Leaving you with two versions of the same file and the torturous task of merging them together without wasting 2 hours of precious billable hours.

Before you scroll any further we’d like to introduce you to the solution you have been searching for, meet Simul Docs.
Simul Docs was built to make your life easier.
To make working together on a Word Document seamless and pain free.
Simul Docs manages version control for you, version control means they will not only save each new document automatically once an edit is made (no minor feat, with this feature alone you’ll never accidentally save over another author’s document again) but Simul gives each document a version number, relevant to when it was last edited.
This makes it easy to see which document is the most recent file and when it was last edited.

To add a cherry on top of this already sweet tool, Simul also puts the author’s name next to the saved document so you know at a glance when it was saved, how old it is AND who created it. It sounds like a lot but for Simul its a breeze and its what they love doing – making your collaborating life a whole lot easier.
Now without sounding too smug, Simul also has a whole heap of other cool features that might help your team collaborate better.
Think tracked changes, they are automatically turned on, every single new change is tracked and saved. You quite literally will never miss an edit again. Amazing!
Then Simul makes merging as easy as the click of a button.

If two team members are working simultaneously on the document, Simul has your back. Simul will allow the changes to be made, save each version as a new document and let you know there are two new updates for your review. Upon review, you can accept or decline each author’s changes and press ‘merge’. Done. Documents merged!
Simul really does make collaborating easy and it’s a tool that will save you time and frustration.
Get Started For Free
See how Simul can help you with a 14 day free trial, and paid plans start at just $15 per month.