Simul Blog
How to add Vertical Lines to a Microsoft Word Document
Adding a vertical line to your Microsoft Word Document can guide the flow of your text.
Vertical lines may also highlight, emphasise and draw your readers attention to a certain section of text. They are a great way to subtly ensure that section of text is given the attention you intended it to receive.
Although adding a vertical line is not quite as intuitive as adding a horizontal line it is still possible and fairly simple.
In this article, we will walk you through a few easy to follow steps to add a vertical line to a Microsoft Word Document. This option allows you to change to the style and length of your vertical line as well as exactly where it is positioned on your page.
It’s vertical lines, the flexible way.

Adding a Vertical Line to your Word Document
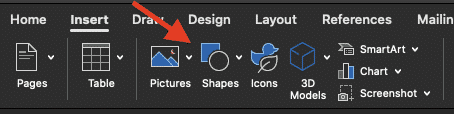
- Open Word
- Click the Insert Tab
- Find and Click Shapes
- Select a line from the Line group
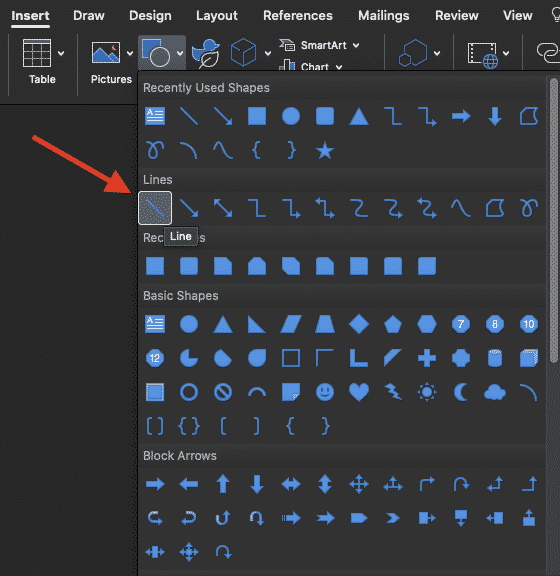
- Click the space on your page that you would like the line to start, but don’t release the cursor just yet
- Drag the cursor to where you would like the line to end
- Release the cursor
You have now successfully added a vertical line to your document, you can increase the length of the line by re-clicking the top or bottom of you line and dragging it a little further.
Would you like a simpler solution to your Microsoft Word Collaboration issues?
Collaborating in Word can be tricky.
It’s safe to say 99% of us have experienced the gut reaching feeling of realisation when you press save and realise you’ve saved over your last version by mistake. You had every intention of clicking ‘save as’ but you were too quick and your brain jumped straight to ‘save’. Poof, your colleague’s old version is gone, replaced by your file.
You only just pressed save, so there must be a way to recover the file.
You find the old version by restoring the old document, perfect. Now you’ve lost all of your new edits, forcing you to restart the whole process again, losing an hour of precious billable time.

If you haven’t accidentally saved over a file before, you may have opened your colleague’s file and started to make your suggested changes. You saw a typo, so quickly updated that. Then you realised they had some old stats in there that you had since updated, so you update those. Followed by some formatting, a few words changed to make it all sound more polished and wooala, the updated version is ready to go.
Smugly press ‘save as’ rather than ‘save’, you didn’t overwrite the old version but you realise once you press exit that you’d forgotten to turn on tracked changes.
Without tracked changes on, no-one else knows what you changed or updated and there is no way for them to check your changes before they are added to the master file.
Before you go back and start again, this time with tracked changes on quickly google ‘better ways to collaborate in Word’, or take our word for it, there is a better way, and it comes in the form of a tool called Simul Docs.

Simul Docs was built to make collaborating in Word easy.
Once you are a Simul Docs user, you can either drag and drop or upload your Word document into Simul and continue working as normal from the Simul dashboard – editing, typing and making changes (its similar to working in Word Online, or Google Docs. It’s still the same Word file, just living online). Or if you’d prefer to continue using the desktop Word, just click ‘Open in Word’ from the Simul dashboard and the document will pop up in you Word itself.
Either way, all of the amazing features we are about to show you will work in Simul or on your desktop once you’ve got Simul on your team.
Simul knows that when you are collaborating, tracking all changes is important. Therefore, when you open any version of your document and start to make changes Simul will track them, track changes are automatically on, every time you open the file.
It’s unlikely that you will ever want to save over your colleague’s file either, so once you make a change to the document Simul will automatically save your updated document as a new version. You can continue making as many changes (all tracked!), updated or edits as you please. Once you have finished, save or exit and Simul has everything stored you.

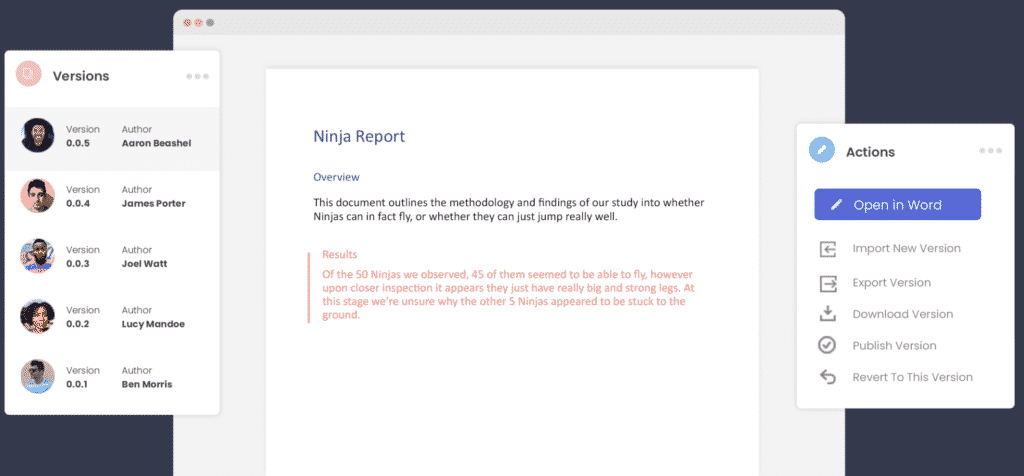
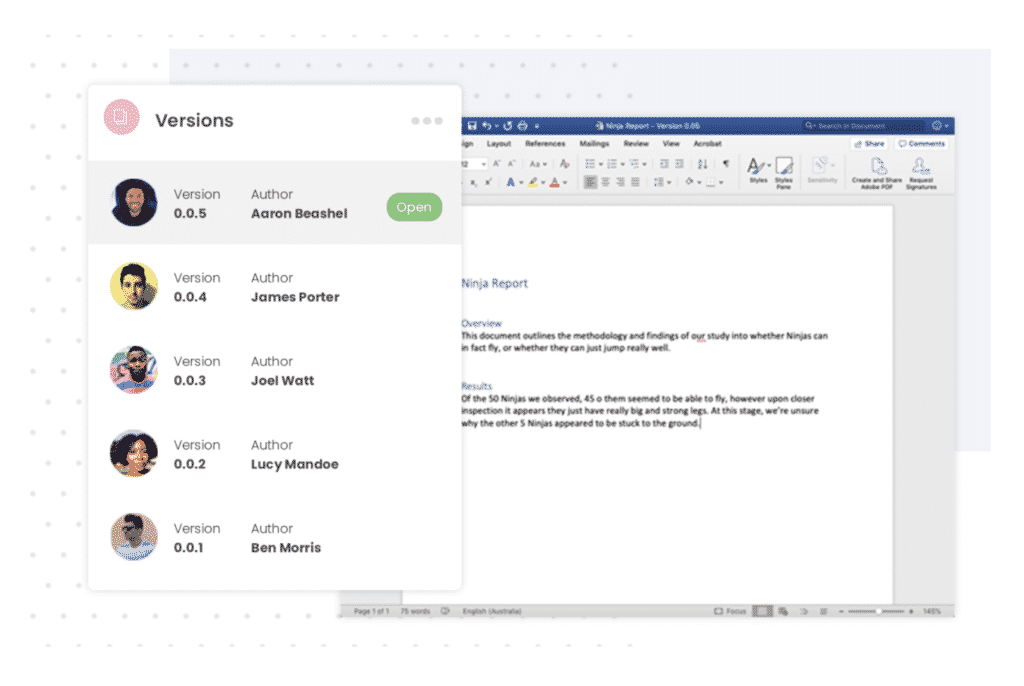
Next time you open Simul Docs to review the document, you’ll see a versions list sitting on your dashboard. Here you can neatly see each version of your document, organised in numerical order and who made changes in or owns each version.
You can use the versions list to refer back to old versions with ease, each saved version will show you the changes made in that version and who made them when.
You can even compare two old versions if you like, to see what happened between them. Or, if two of your co-workers accidentally open the document at the same time and make changes, leaving you with two different versions of the same file Simul will flag this, and then offer you the option to accept/decline each author’s changes before the tool merges the documents together so you can continue collaborating with ease.

With tracked changes automatically on, version control handled, easy merging and so much more.
Simul Docs is the collaboration tool you’ve been waiting for.
Get Started For Free
See how Simul can help you with a 14 day free trial, and paid plans start at just $15 per month.