Simul Blog
How to change the text orientation in Microsoft Word
Are you trying to change the orientation of your text in word from horizontal to vertical? Or spin it upside down?
The good news is, its possible! There are two ways you can change the orientation of your text in Word, the simplest being inserting and spinning a text box.
Why change the orientation of your text?
Maybe you are creating a flyer with tear-off tabs on the bottom with your mobile number or details for potential customers, or simply trying to create a sidebar for your document or newsletter. There are so many reasons for flipping your text in Word!

In the post, we will show you how to rotate, spin and turn your text upside down by adding a text box.
Rotating the text in your Word Document
- Open Word
- Click Insert
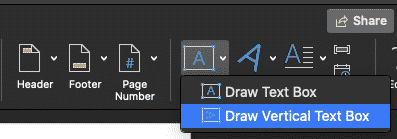
- Click Text Box
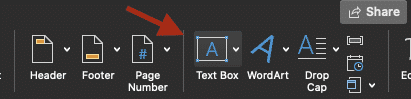
- Select the text orientation you would like in your text box
- Hold and click your mouse to draw out the text box
- Re-size your text box using the sizing boxes
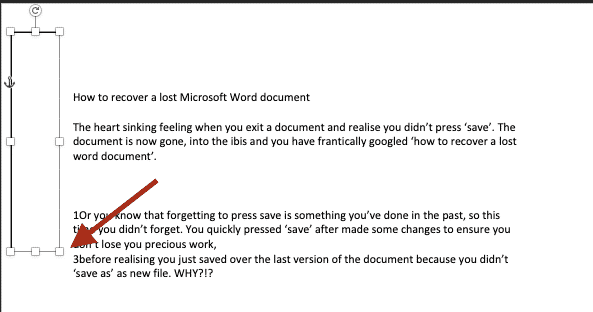
- Place your mouse cursor in the text box and type your text
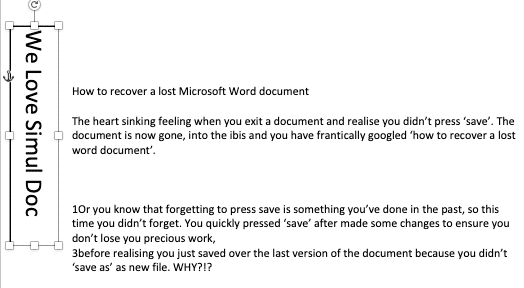
- To rotate your text, click the rotation handle at the top of your box
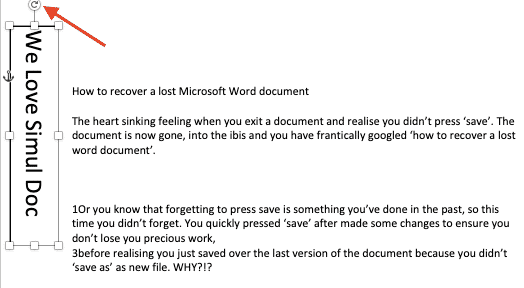
- Click and Hold to spin your text box in any direction
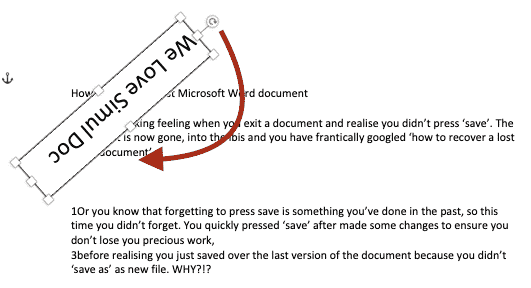
You have now succesfully change the orientation of your text in word.
Rotating your text is easy, there is no limit to how many text boxes you can add to your Word Document nor how much text can be placed into a single box.
Rotate and flip as much text as you need to make your Microsoft Word document perfect.
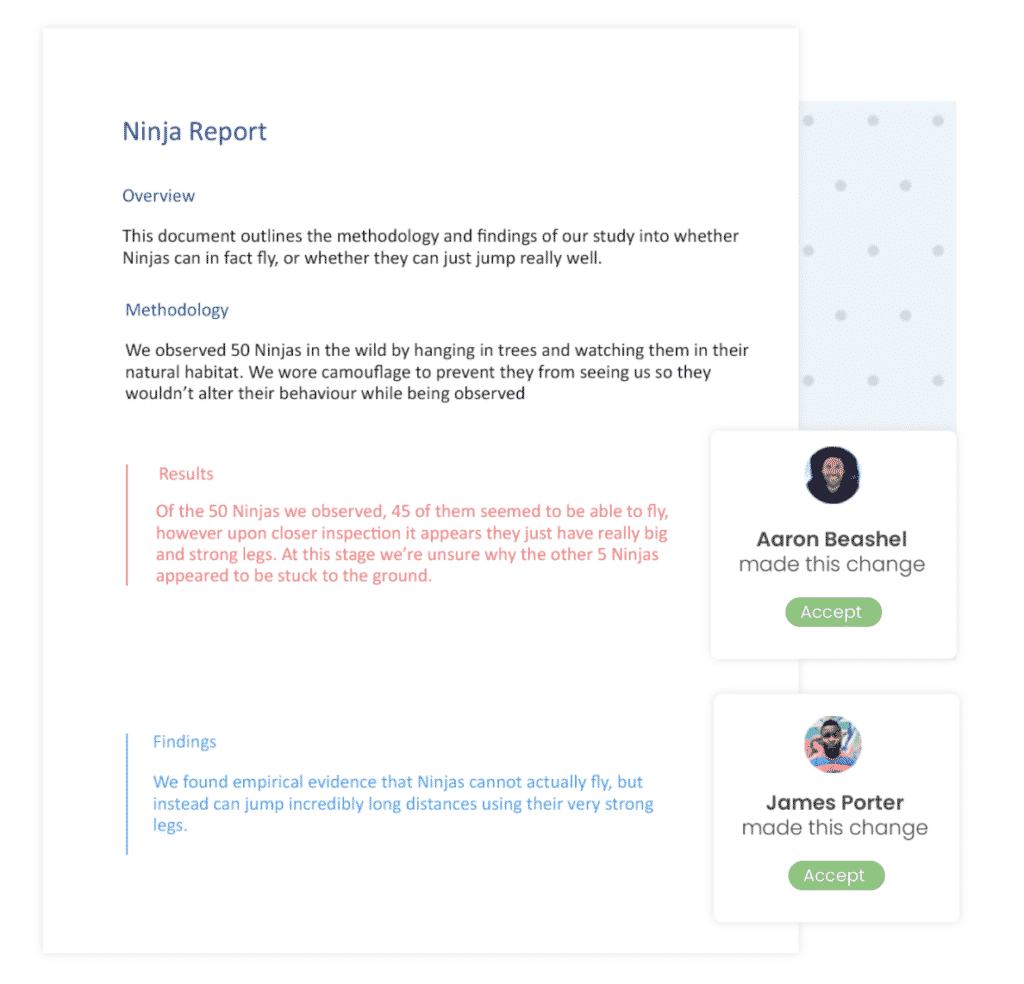
Looking for an easier way to Collaborate and Merge Word Documents?
The most common reason we need to merge multiple Microsoft Word Documents is that you are collaborating on a file with your team and two or more team members made edits at the same time. Leaving you with multiple versions of the same document and no way to easily merge them together.

Manually merging your documents by copy-and-paste is tedious, while Microsoft’s insert object tool only allows you to stick one document onto the bottom of another. What about merging them – combining them, paragraph for paragraph and picking up on the tracked changes between the two?
This is where purpose build documents such as Simul Docs really shine.
Simul Docs was built with better collaboration in mind. Making it easy to compare different versions of a document – regardless of whether tracked changes were turned on or not – so you always know what changed, who changed it, and when.
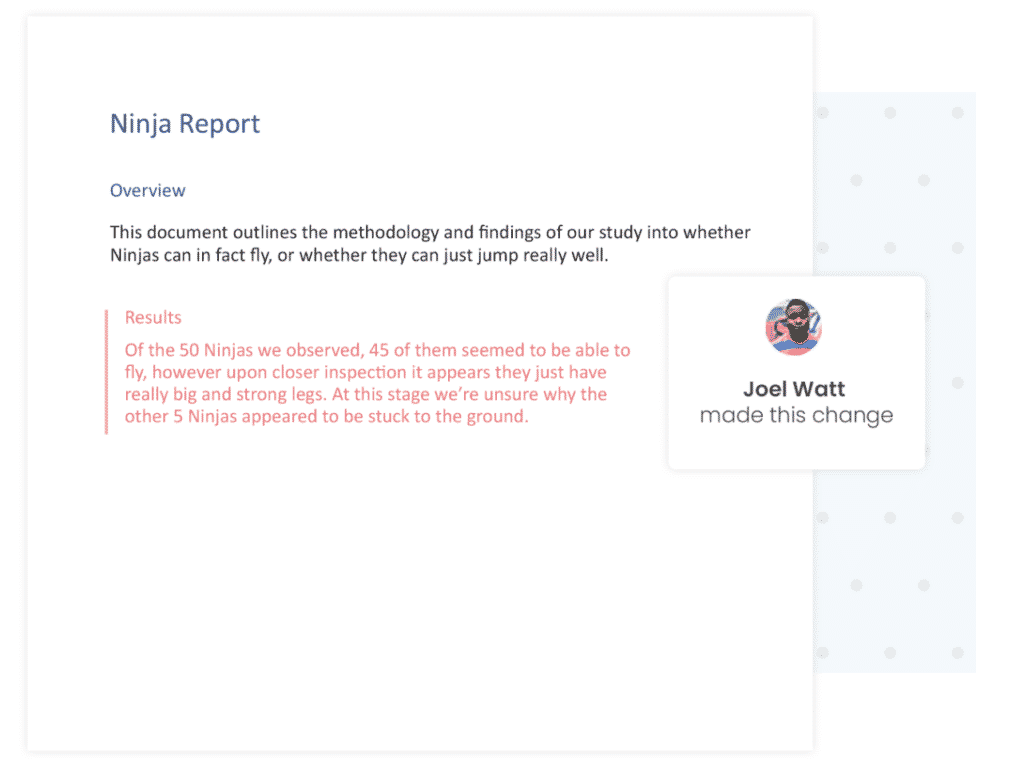
Simul automatically recognises when multiple people are editing the document at the same time, and saves each person’s changes in a separate branch so that nobodys work gets overridden.
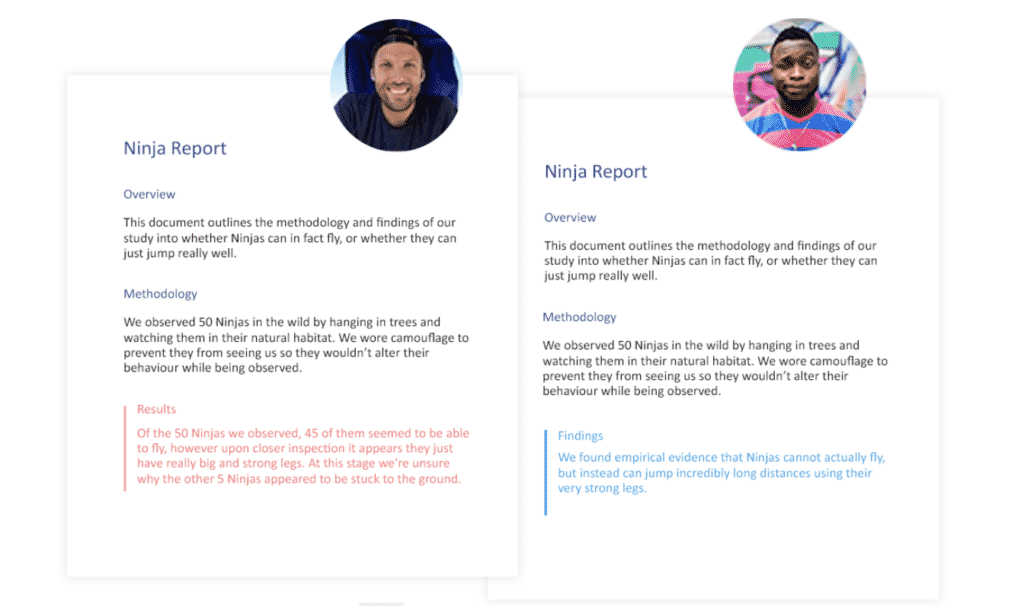
You can then merge these branches in just 1 click, and each author’s changes are marked up as tracked changes in Word, allowing you to easily identify the differences, accept or reject the changes, and fix any conflicts.
With software like Simul Docs on your team, you can collaborate with ease. Knowing that Simul will track everything for you, manage your version control and allow you to easily merge multiple documents together at the click of a button.
Get Started For Free
See how Simul can help you with a 14 day free trial, and paid plans start at just $15 per month.