Simul Blog
How to Customise borders in Microsoft Word
You’ve added a border to your Microsoft Word document, but single black line border just isn’t quite bringing out the flair you know your document should have. Microsoft now offers a border customisation feature, ensuring there is a border for almost every purpose.
Gone are the days of printing documents on pre-bordered paper, or hand embossing a beautiful border on yourself – although, there is something about a perfectly executed, DIY border that will always catch our eye.
If your short of time or the artistic flair to add a hand-drawn border to your Word document, customisation is for you.

Customising your border in Word will allow you to use different border styles, fonts, widths or colours on each edge. You can even remove the border from one side, for example, creating a page frame with a left-hand side and top border only. With border customisation, it is completely up to you what you would like the end product to look like. The fun part is, Word now has you covered!
In this post, we will show you how to customise your page border in Microsoft Word and leave you to decide which customisation will make your document stand out.
Customising your border in Word
- Open Word
- Press the Design tab
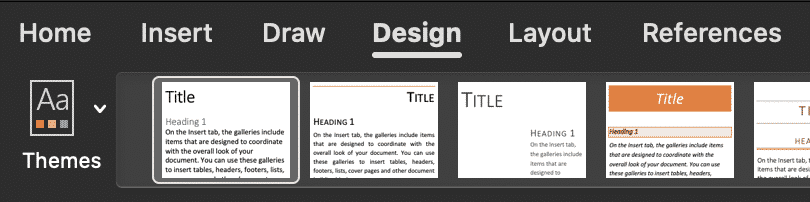
- Press Page Borders

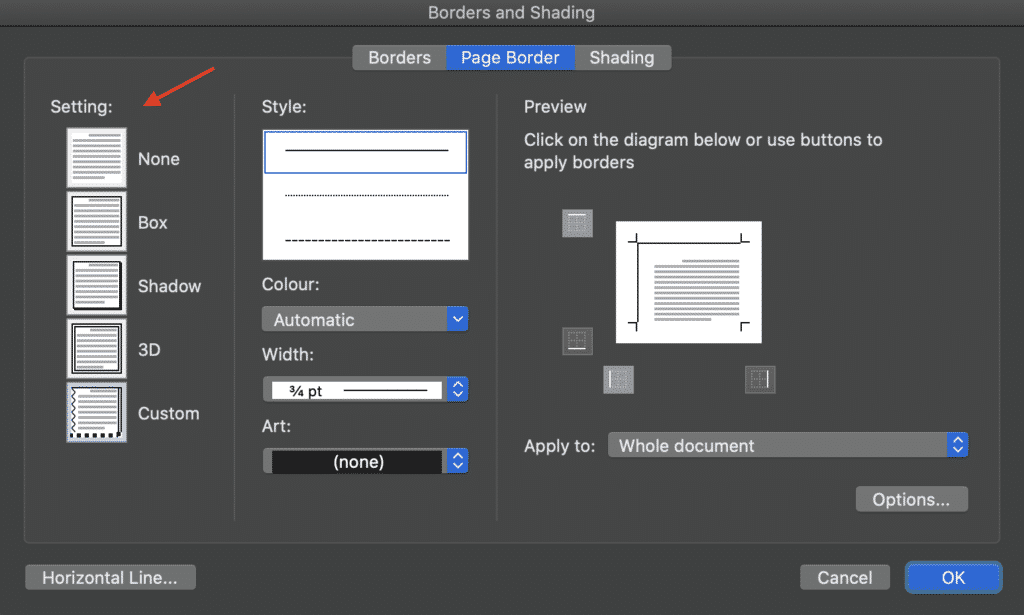
- Select your border Setting
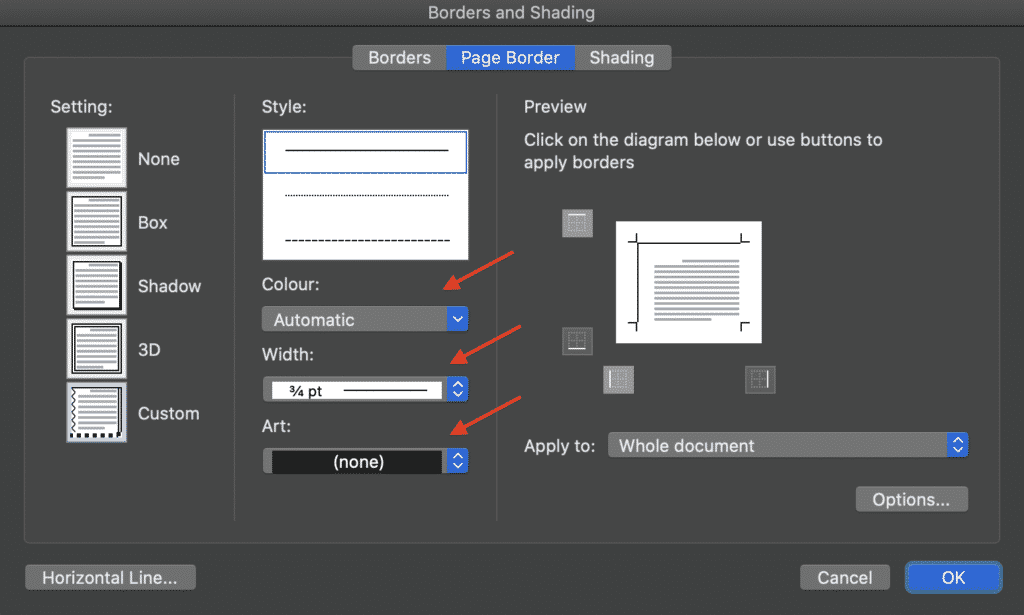
- Change the Style of your border

- Choose your border’s Colour, width or the Art you’d like you use
- Select which Sides of the document you would like that border on

- Press OK
Would you like a simple solution to your Collaboration concerns?
You’ve been tasked with updating and styling the header on a Word Document that your team has been collaborating on before it is sent off for final review. You spend hours making it look perfect, aligning the logo and making sure the text is perfect. When you are happy with the final result, you press save, give the document a new version number, let’s say presentation_v18_Headerupdated and cross your fingers the rest of your team are able to find the document in the cluttered, unorganised shared drive.
John in marketing misses your updated document and starts editing an old version, leaving your team with two ‘new’ versions of the same document and no way to merge them together. Its no-ones fault, the team just work quickly and all have slightly different methods of naming and storing files.
With so many different methods, this is where collaboration becomes harder than it should be and you can enlist the help a tool built to manage version control.
A tool such as Simul Docs.
Simul Docs was built with you in mind, with the understanding that you don’t want to continue living with a messy shared drive and you’d love to be able to access files at the click of a button.
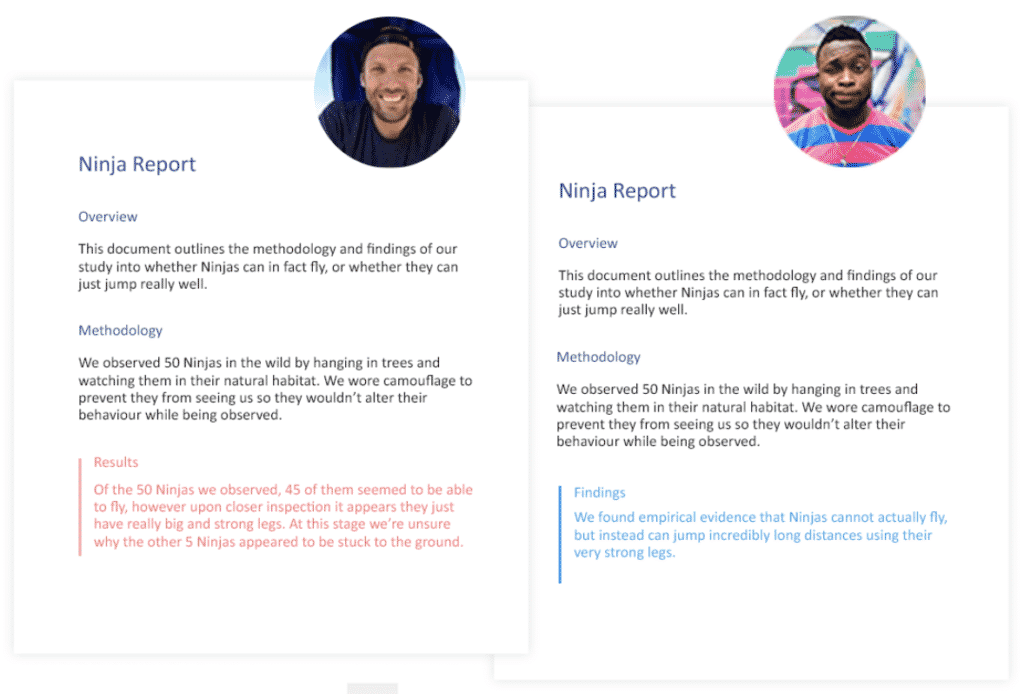
By importing the first version of your Word Document into Simul, Simul will automatically save this file as version 0.0.1, with your name next to the document as its author.
You can then share the document with whoever you’d like to collaborate with. Send it to the marketing team, to your manager and to your client.
By sharing the document, your colleagues will receive an email letting them know you have a document waiting for their review. When they click the Simul link in the email, the Word file will automatically open for them in Simul’s easy to use dashboard. Each user can then decide if they’d like to edit the document directly in Simul, or export it out and edit in Microsoft Word.
No matter which editing option they choose, all of the handy Simul collaboration functions will work.
As they start to make some minor (or major) edits, Simul will track every change, without them even turning on comments or tracked changes. Because a change that isn’t tracked can cause confusion for everyone.
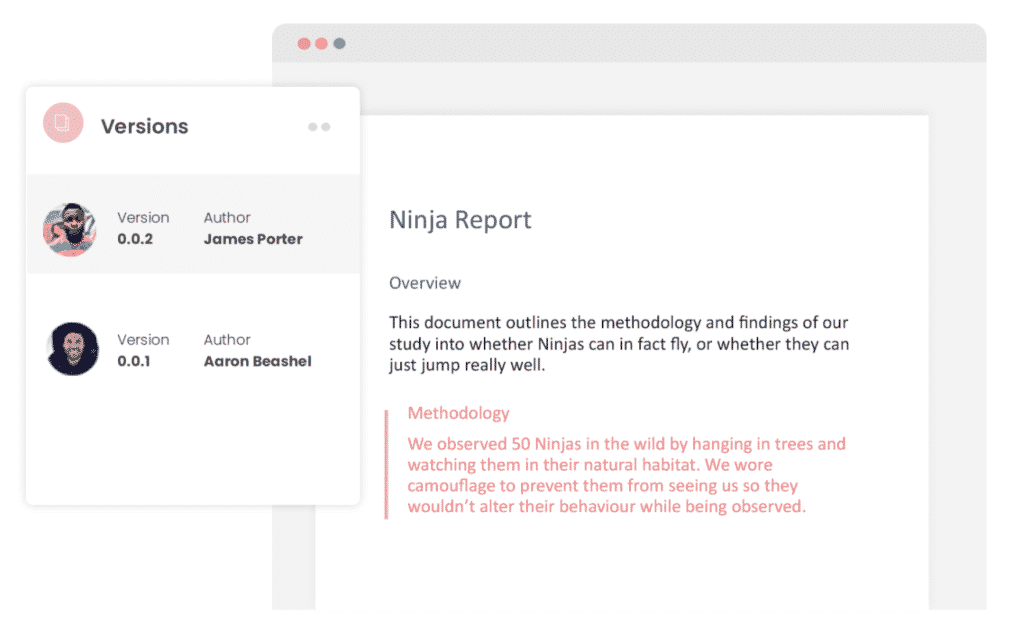
Now they are done editing, they press ok and close Simul (or Word). You will be sent an email letting you know there is now a new version (in this case version 0.0.2) with some changes for your revisions.
Jump into Simul, accept or decline the changes or just thank the author for their amazing efforts and you’re done.

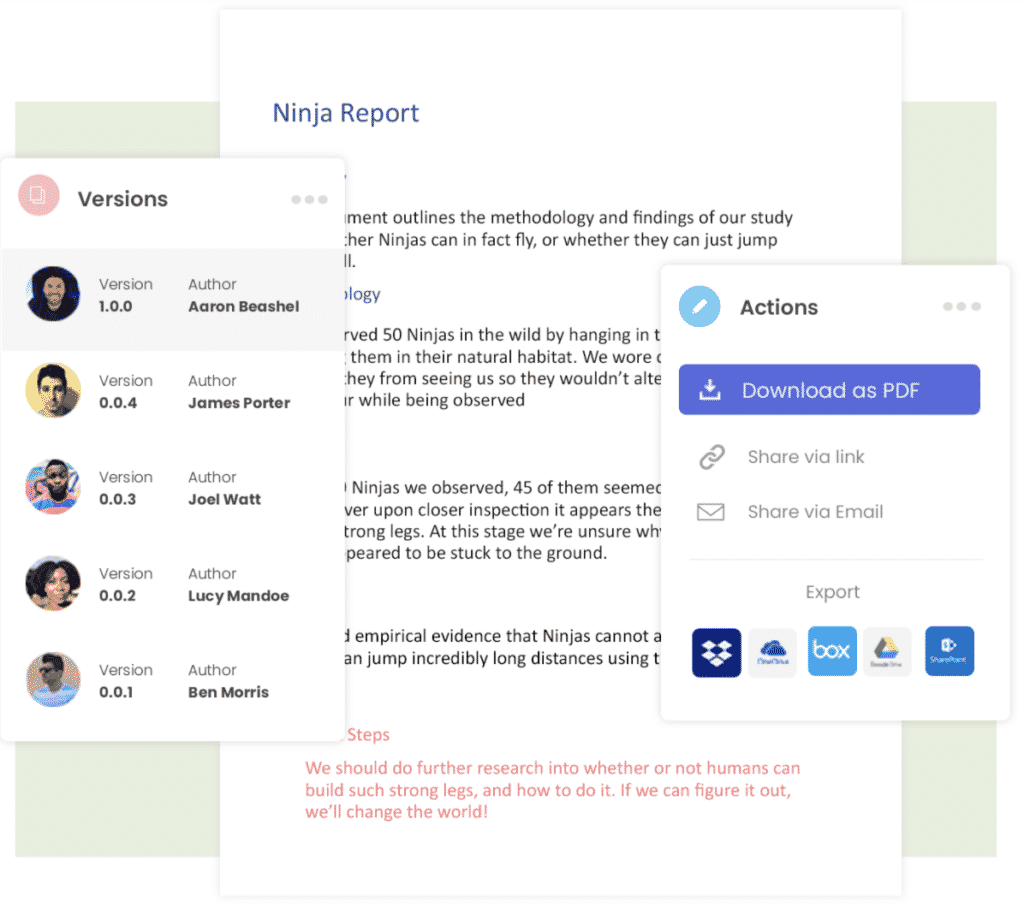
This process can be repeated with as many versions, authors, collaborates and edits as you please. There is no limit to how long your collaboration can take, Simul will work in the background for you for as long as you need.
Once you’ve reached the final version of your document, you can save, export or share the file using any cloud sharing system you already have in place, such as GoogleDocs, Dropbox and OneDrive. Or, share via email or a direct link.
If you’d prefer to just export the final version and drop it into your shared drive, that’s simple too. Export the file as a Word doc. or PDF and save it wherever you like.
It’s a great way to collaborate, knowing in the back of your mind that Simul is keeping an eye on all of the changes made so you won’t miss a thing.
Get Started For Free
See how Simul can help you with a 14 day free trial, and paid plans start at just $15 per month.