Simul Blog
How to insert a signature in Microsoft Word
If you are looking for a way to personalize your Microsoft Word document, inserting a signature is a great start. Here are some ways you can add your signature to a Word document like a letter:
- Inserting a digital signature
- Inserting your handwritten signature as a picture
- Inserting a signature line for a post-print signature
This post will show you the different ways you can add your signature at the end of your Word document to give it a personal touch.
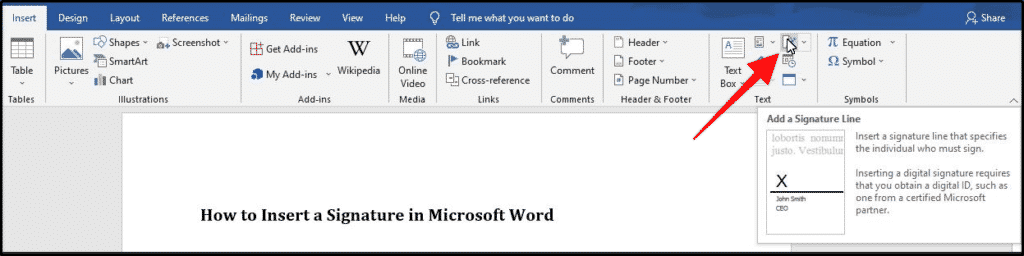
Insert a signature line for a post-print signature
A signature line gives you a location to sign a printed document. You can add one to your document by following these steps:
- Click on the Insert tab. In the Text section, click on the Add a Signature Line icon.
- In the Signature Setup dialog box, fill in your signature details, then click OK to save.
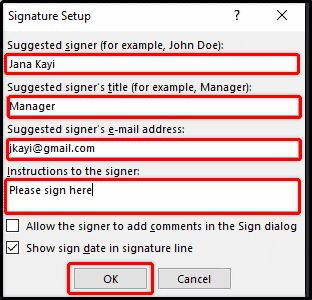
- Once you have confirmed your signature details, a signature line is inserted with a cross and a line to show you where to sign.

After successfully inserting your signature line, you can insert a digital signature, a picture of a handwritten signature, or print the document to be signed after printing.
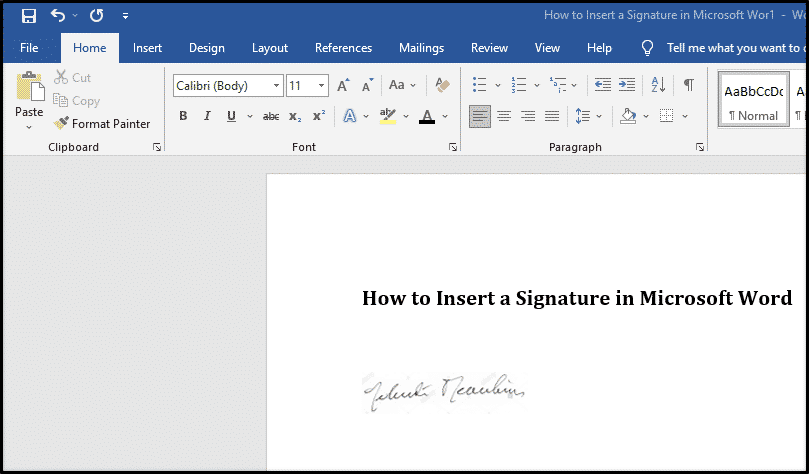
Insert your handwritten signature as a picture
If you prefer to use your handwritten signature, this is the method for you. Follow these steps to insert your handwritten signature as a picture:
- Write your signature on a piece of paper.
- Using a scanner, scan and upload the page to your computer in a .jpg, .png, .bmp, or .gif file format.
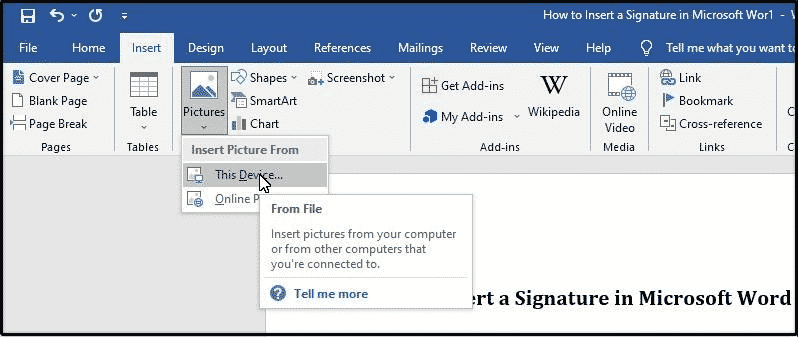
- In your Word document, click on the Insert tab.
- From the Pictures dropdown menu, select This Device.
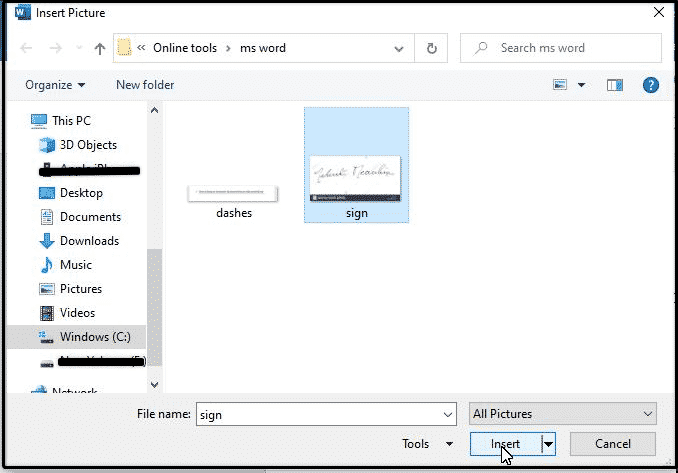
- From the Insert Picture dialog box, select the scanned image of your handwritten signature, and click Insert.
- Crop and resize the image in your document as you see fit.
Insert a digital signature
A digital signature is an encrypted electronic form of authentication that confirms a document has not been altered. To add one to your Word document, you will need to obtain it from a certificate authority or a Microsoft partner.
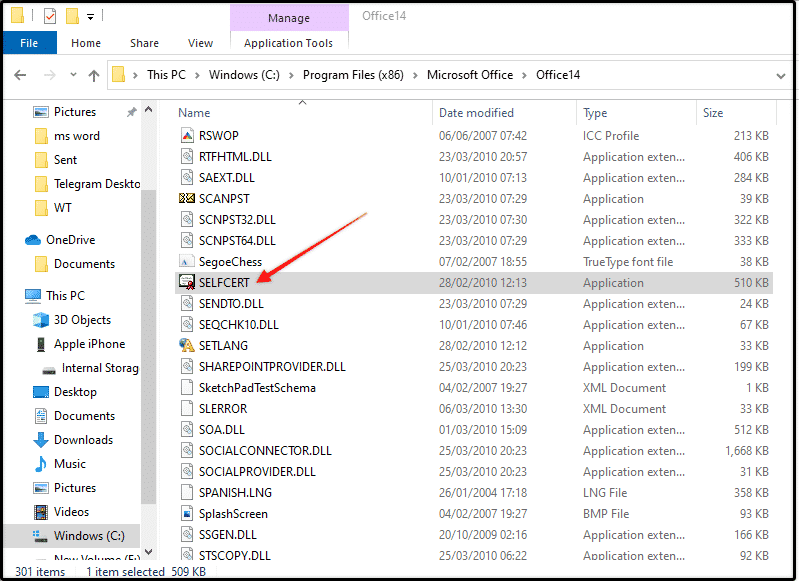
Alternatively, you can follow these steps to create your own digital certificate using the Selfcert tool.
- In your Office Installation Folder, double click on Selfcert to open the tool.
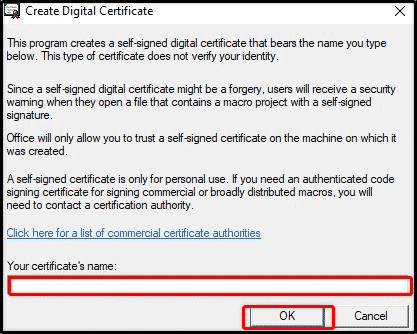
- In the Selfcert tool, type a name for your certificate in Your certificate’s name and click OK.
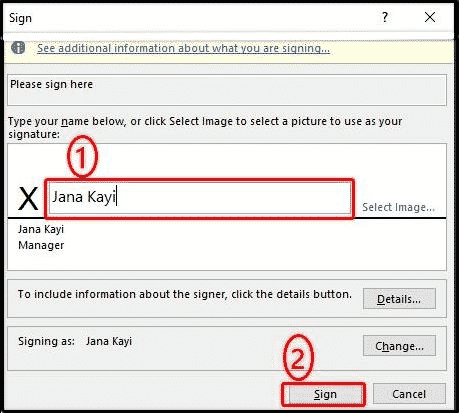
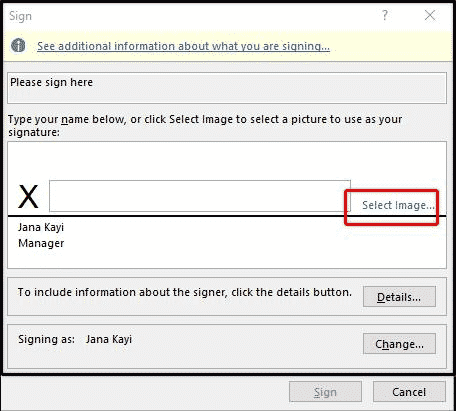
- Return to your document. Insert a signature line. Double click above the signature line. In the Sign dialog box that appears, type your name next to the X, the click Sign.
- Alternatively, you can use a picture of your handwritten signature. In the Sign dialog box, click Select image to insert a picture of your handwritten signature.
Include typewritten text with your signature
Use Word’s Quick Parts and AutoText feature to add information like your job title, email address, and phone number to your signature in the following steps:
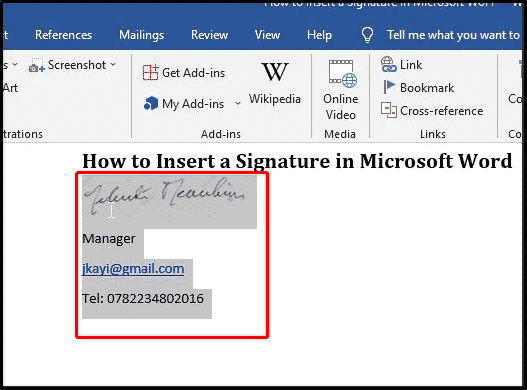
- Insert the scanned image of your handwritten signature in the document.
- Type the text you want under the signature.
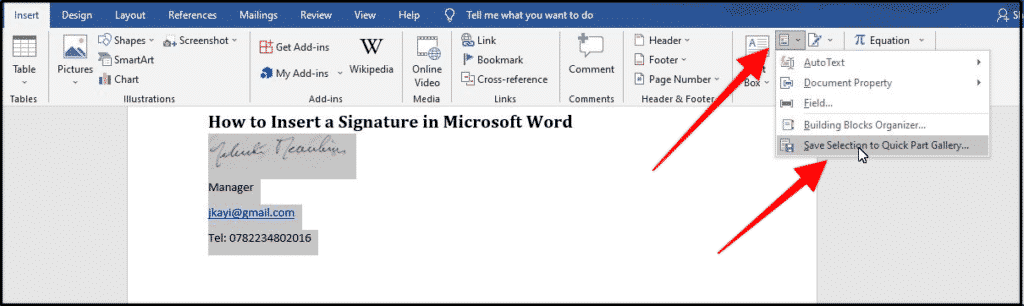
- Select both the image and the text.
- Click on the Insert tab, then click on the Quick Parts icon. From the dropdown menu, select Save Selection to Quick Part Gallery.
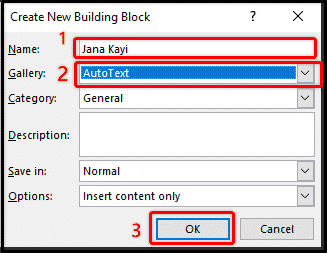
- Fill out the details in the Create New Building Block box. In the Gallery textbox, select AutoText from the dropdown menu. Click OK to save.
- When you want to use this signature block, click Insert, then go to Quick Parts, then go to AutoText, and then click on the name of your signature block. It will appear automatically.
Looking for an effective way to track changes in your documents?
Have you been struggling with keeping up with all the changes members of your team are constantly making in collaborative documents? Simuldocs is here for you.
With Simul, every change you or anyone else is automatically tracked. Each change comes with an Accept or Decline button next to it for easy review and updating of the document. Simul also allows you to add comments and notes to your document, and will alert all collaborators on any changes made and any new versions available.
You no longer have to worry about accidentally making changes in your document without turning on Microsoft’s tracking feature. With its automatic tracking and saving features, Simul allows you to focus on maximizing your productivity without compromising the quality of your work.
Get Started For Free
See how Simul can help you with a 14 day free trial, and paid plans start at just $15 per month.