Simul Blog
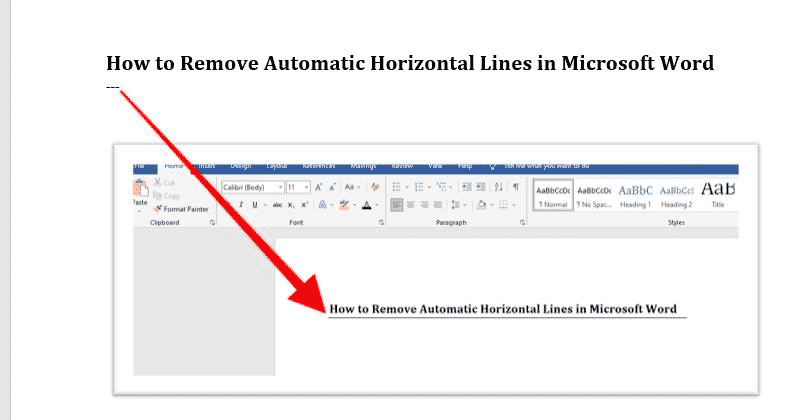
How to remove automatic horizontal lines in Microsoft Word
You’ve probably noticed that when you type at least three hyphens and then press Enter, Microsoft Word replaces the hyphens with a horizontal line that spans the width of your document. This is an automatic formatting feature that works with underscores, equal signs, asterisks, tildes, and pound signs too, providing different kinds of horizontal lines for each symbol.
It is a great tool for saving time when you need to split up a Word document with simple dividers for readability. However, it gets annoying when you actually want those symbols to appear without being formatted into horizontal lines. To make matters worse, when you try to remove the line by pressing Backspace or Delete, it stubbornly remains.
You can manually press undo every time you encounter the horizontal line, or change your setting to turn off this function. In this article, we will look at the different ways you can remove automatic horizontal lines in Microsoft Word.
How to Remove Automatic Horizontal Lines in Microsoft Word
Pressing “Ctrl + Z”
Press “Ctrl + Z” as soon as Word converts your characters to a horizontal line. This undoes Word’s action. The line is removed, and your characters remain.
This solution, while simple, can be impractical. If you have done more work after the characters were converted into a line, then the undo shortcut will not work. This leads us to the next method.
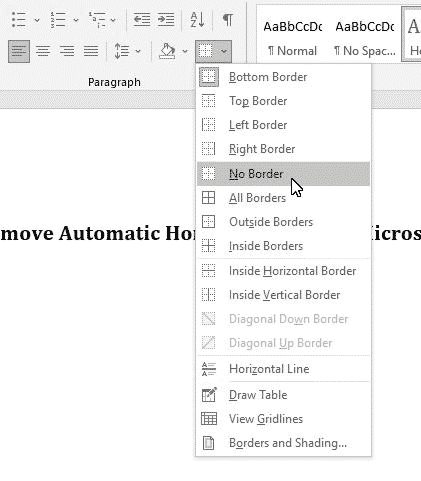
Selecting “No Borders”
To understand this method, you should understand how Word added the line in the first place. The horizontal line is not actually a line but a bottom border. This is why you can’t delete it the usual way with Backspace or Delete. Follow these steps:
- Click directly above the line.
- Go to the Home tab on the ribbon.
- In the Paragraph section, click on the dropdown arrow next to the Borders icon and select No Border from the dropdown menu.
Turning off AutoFormat feature
Finally, you can turn off the AutoFormat feature that makes Word automatically convert your symbols into horizontal lines using these steps:
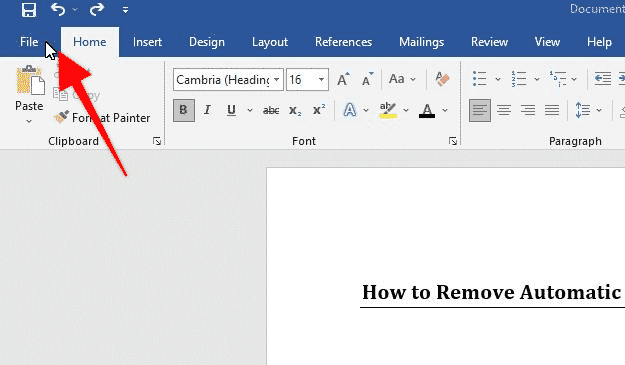
- Click on the Files tab.
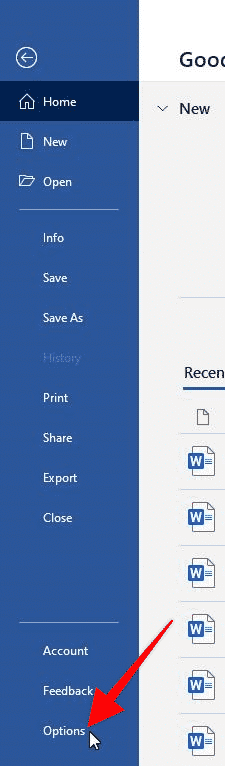
- Go to options.
- In the Word Options dialog box, select Proofing.
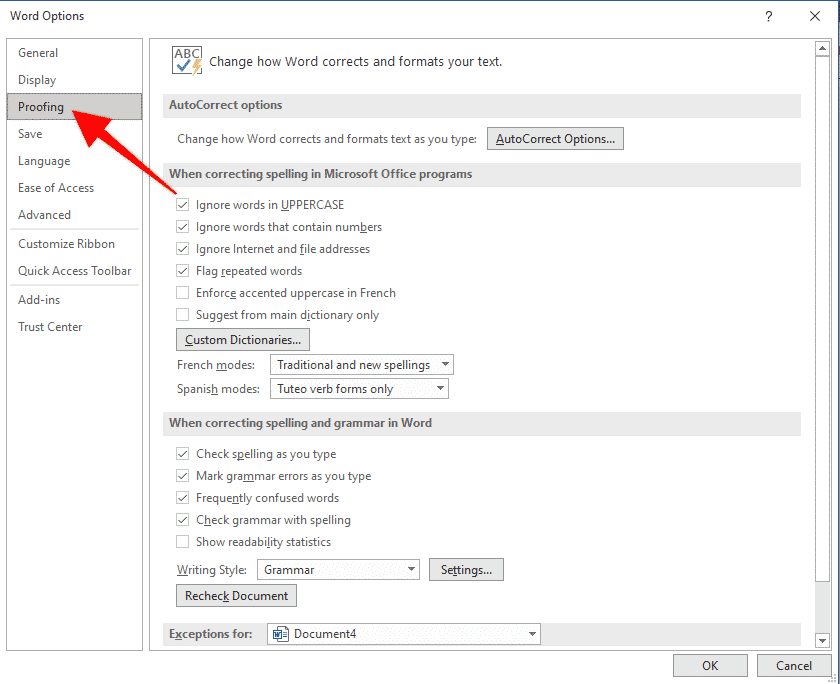
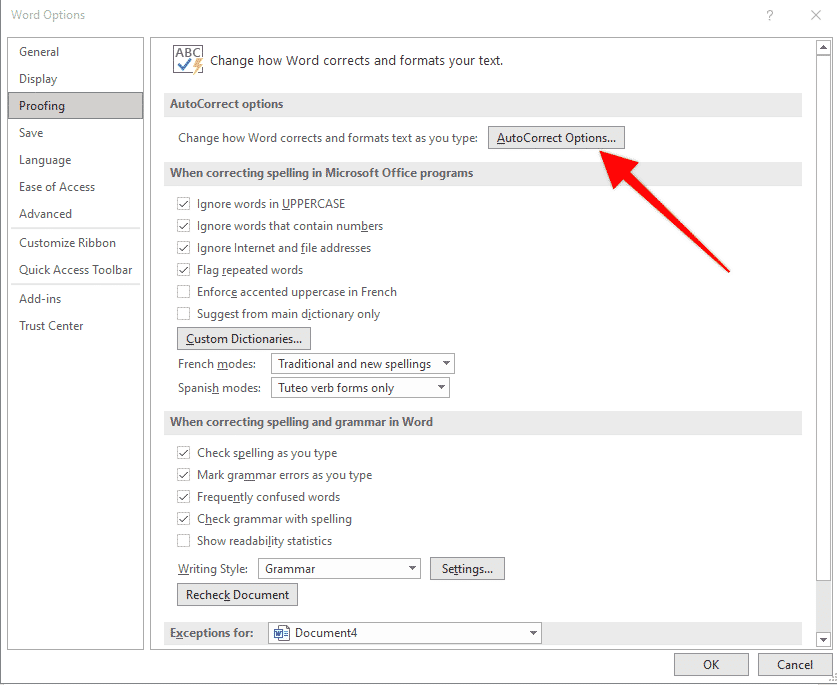
- Click on the Autocorrect Options button.
- In the Autocorrect dialog box, click on AutoFormat As You Type.
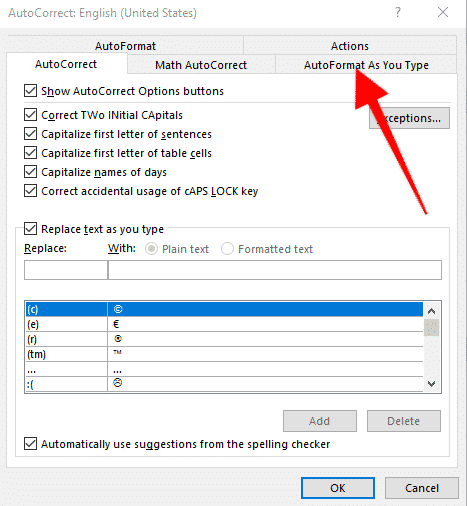
- In the Apply as you type section, click the checkbox next to Border lines to remove the checkmark in the box.

- Press OK to accept the changes. Once you close the dialog box, you’ll be returned to the Word Options dialog box, where you’ll have to click OK to close it.
Looking for a way to ease collaboration on Microsoft Word documents?
More often than not, a team working together on a Microsoft Word document to achieve a perfect final draft will find the process cumbersome. The end result is often a folder filled with multiple versions of the file which you’ll have to go through to find the final version.
The situation is further complicated if the team is working on a document on a shared drive. One of the team members may download the file and make offline changes, then upload it again when another member has made online changes to the document already. So, now you have two updated versions of the same document and no way of knowing which is the most recent.
Luckily, companies like Simul Docs have developed tools to help Microsoft Word users to collaborate on documents with ease. Simul Docs tracks changes made in a document and updates it to a most recent version while simultaneously making this version available to all collaborators on the document immediately.
Simul Docs saves every edit you or anyone else makes in the document, word by word, and creates a new version of the document after every edit is saved. This means you don’t have to press Save As before you begin edits, and you don’t need to press Save every thirty minutes after that.
The tool also allows you to access your documents offline. You can make changes and re-format with the knowledge that once your device is back online, Simul will update the file so that the team can see and save it in line with the version history.
With Simul Docs, you can see every version of a document in one single interface, and you won’t need to dig through old email threads to find the latest version of your document.
Get Started For Free
See how Simul can help you with a 14 day free trial, and paid plans start at just $15 per month.