Simul Blog
Saving a Word Document as a JPEG
Are you looking to convert your Microsoft Word Document into an image?
Although this is not common practice, with the conversion into a PDF the most frequently used method to finalise and send a document. This doesn’t mean it can’t or shouldn’t be done.
When converting your document into an image, it’s always good to consider the size of the file and the end resolution and ensure that the result will suit your desired outcome. Without knowing why you are wanting to save the document as a JPEG we can’t tell you what resolution will work best for you, but let’s just go for high res to tick all the boxes!
Now you can’t just save your Word Document as a JPEG as you can a PDF, which does make it a little tricker.

However, there are a few solutions to converting your file into an image, the simplest and one that is going to provide you the highest resolution image is to save your document as a picture.
In this post, we will walk you through how to save your Word Document as a image.
How to Save a Word Document as A JPEG
Option 1 – Save as a Picture
- Open Word
- Highlight all of the text and images you would like to save as an image.
- Note, if you are looking to save your whole document as a JPEG, highlight the whole thing from start to finish
- Click Copy

- Open a new Word Document

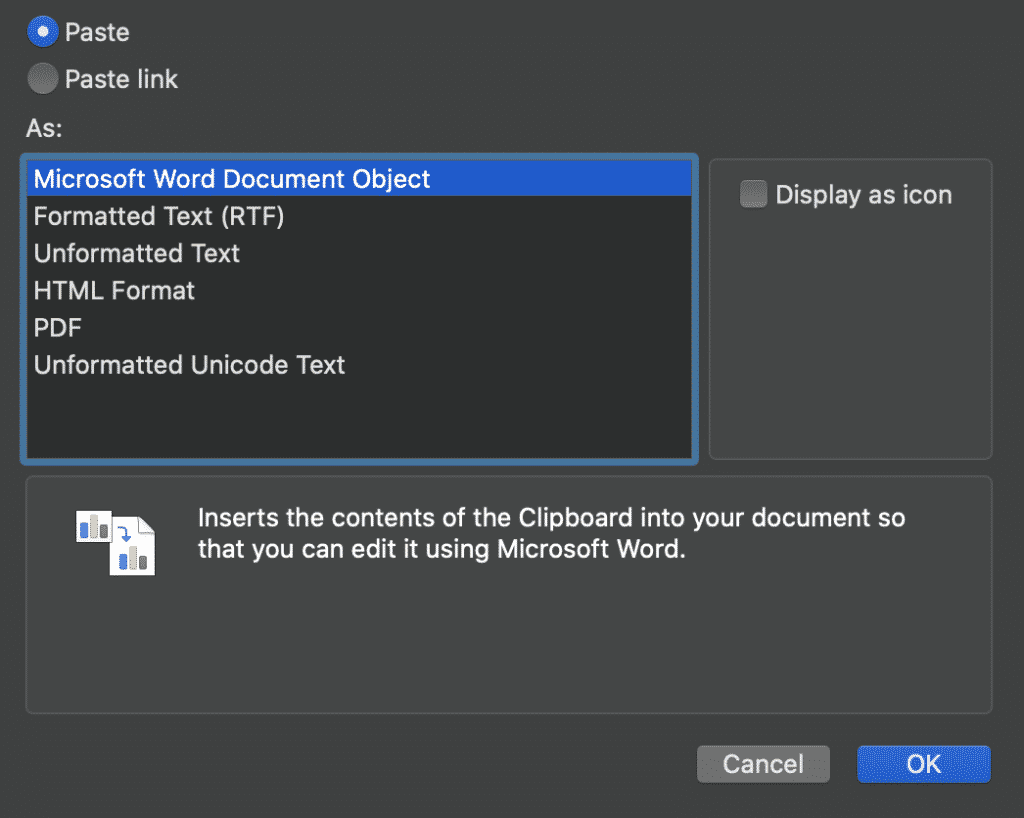
- Press Paste Special

- Click Paste as Microsoft Word Document Object
- Click OK

- Right-click the object image and click Save as Picture
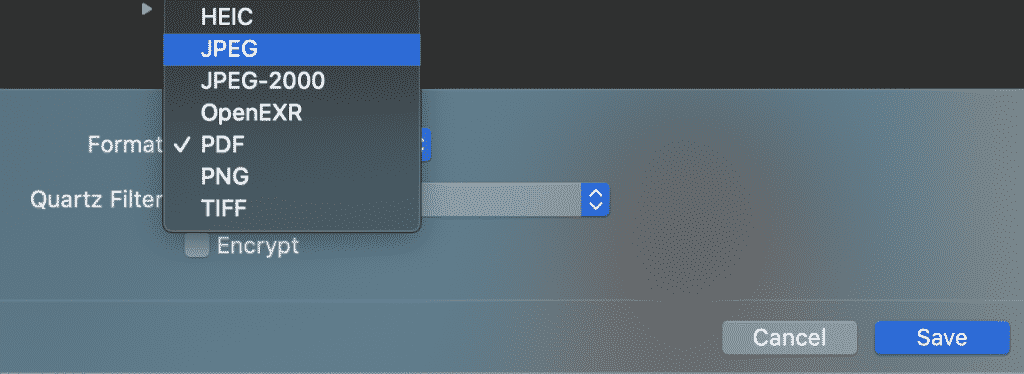
- Select JPEG format
Option 2 – Save as a PDF and convert to a JPEG
- Open Word
- Click File > Save as
- Click save as PDF
- Open the PDF File
- Click File > Export

- Under format click JPEG

- Click OK
You have now successfully saved your document as a JPEG. Using these steps, you can also save your Word Document as a PNG or TIFF as well.
Searching for a better way to manage tracked changes in Microsoft Word?
We’ve all be there, when you are quickly making your final changes to a shared Microsoft word document and press save, then that sinking ‘I just saved over that file’ feeling hits your stomach…
You forgot to save your doc as a new version and accidentally just saved over the last version in the shared drive. And no, you didn’t remember to turn tracked changes on, so have no way of knowing exactly what you changed. Why does this happen to so many of us?

There should be an ‘automatically track every change I make for the rest of my working life’ button that we can install into Microsoft Word. There should be, but there isn’t.
With so many of us hitting the same pain points, there are some clever tools out there that allow you to continue working on Microsoft word documents while collaborating more seamlessly.
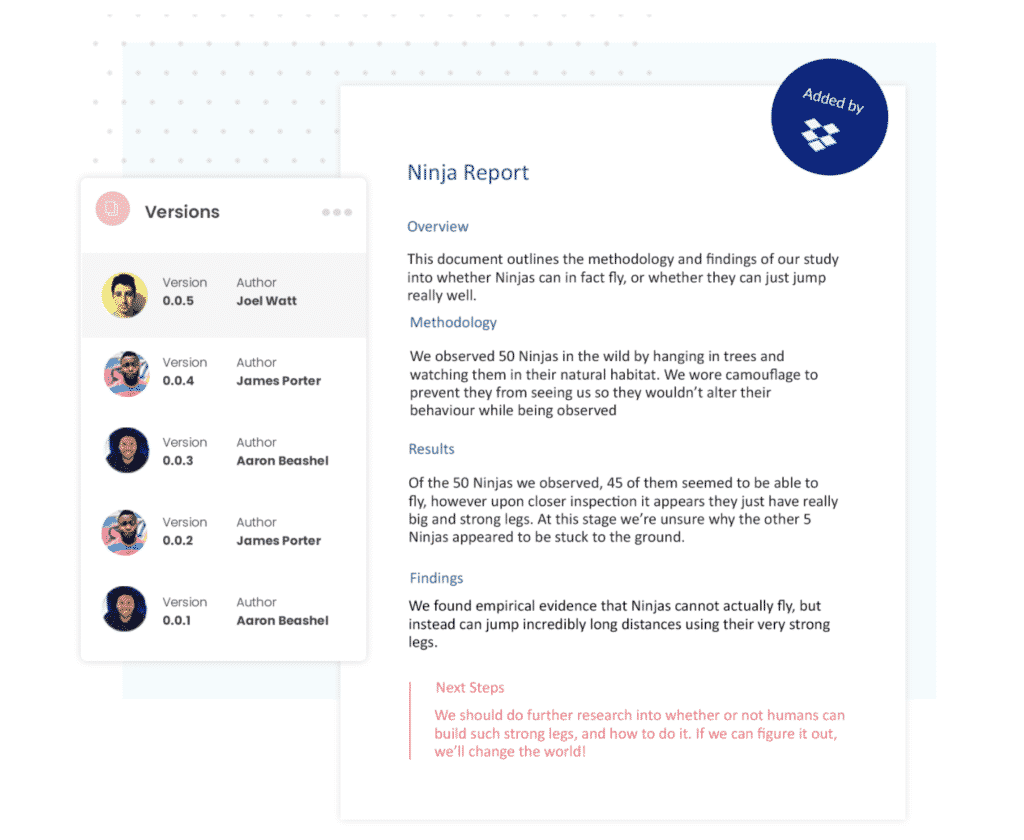
Tools such as Simul Docs make collaborating easy. They will always track your changes, even when you forget to turn them on. It’s automatic in Simul.

When you open a shared document, Simul Docs will also automatically save your document as a new version from the moment you start making changes. Leaving no room for error, you’ll never save over your document again.
As your team continue to collaborate on the document, Simul Docs will continue to track all of the changes and save each version a new document. Placing each new version into an easy to use ‘Versions’ list, allowing you to refer back to an older version with ease, referencing old changes at the click of a button.

If you do forget to turn on your tracked changed, or accidentally save over older versions a tool like Simul Docs could save you time and a whole lot of frustration.
It’s worth signing up for a free trial. You’ve got nothing to lose, except the files you keep saving over!
Get Started For Free
See how Simul can help you with a 14 day free trial, and paid plans start at just $15 per month.